

To easily install Magento 2, you can use the Softaculous auto-installer available from your cPanel. It will automate the steps needed for the installation into one configuration page and 30 seconds of waiting for the install.
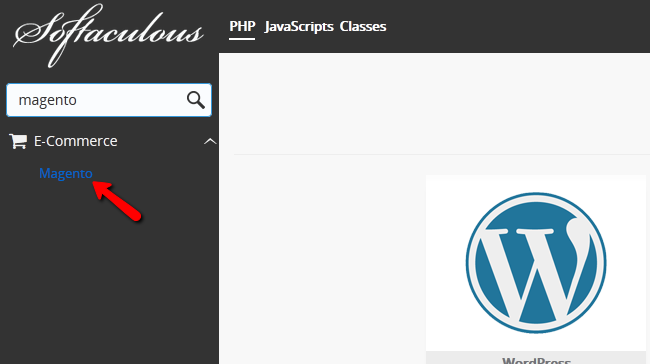
STEP 1 Locate Softaculous in cPanel
To access your Softaculous auto-installer simply login in your cPanel navigate to the Software/Services section and click on the Softaculous Apps Installer icon.

Now you will need to use the Search bar to look for Magento and click on it.
STEP 2 Configure the Installation
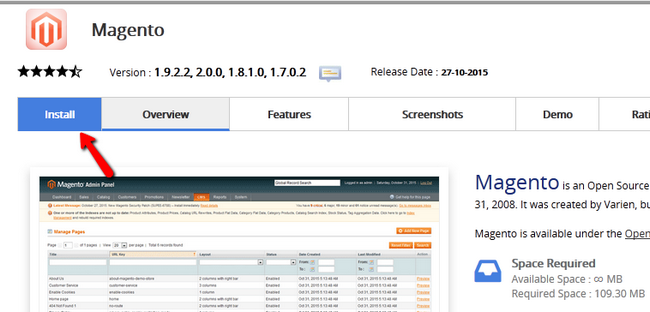
Here you will see different tabs containing overview of the features and reviews of the platform. Click on the Install tab to continue.
Now you will be able to configure the Installation details:
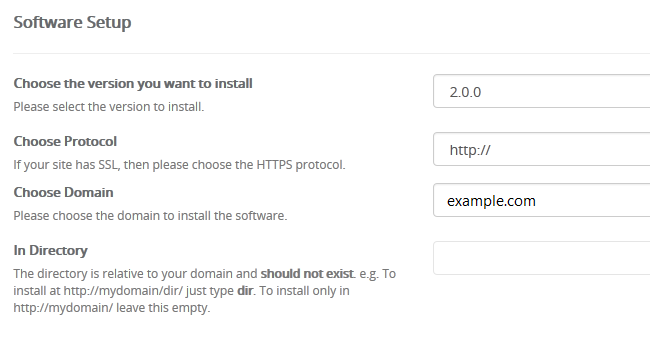
- Choose the version you want to install - Here, you will need to select version 2.0.0
- Choose Protocol – If you have a valid SSL certificate activated for your domain, then you can select https://
- Choose Domain – Select the domain on which you would like to install Magento 2
- In Directory – If you want to have your store accessible directly via your domain name (https://www.CloudTechtiq.com) then you should leave this box empty. In case you would like to have your Magento store accessible via any subdirectory , please fill the directory’s name.
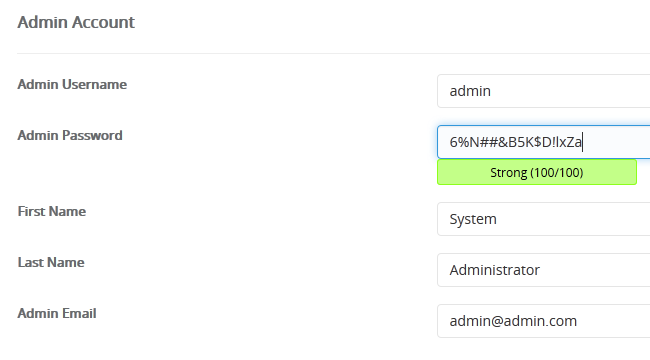
STEP 3 Create an Administrators Account
- Admin Username – The username for your admin account
- Admin Password – The password for your admin account
- First Name – The First Name of the owner of the admin account
- Last Name - The Last Name of the owner of the admin account
- Admin Email – An email that will be associated with the Admin account and on which you will be able to receive account recovery emails and store emails.
You will be able to setup a few Advanced Options as well:
- Database Name – Here you can change the name of the database that will be created during the installation process
- Table Prefix – Prefixes are used to distinguish different applications’ tables situated in the same database, you can leave that as it is or change it for a more secure database
- Disable Update Notifications – If you checkmark this box, you will not receive notifications for newer versions of Magento
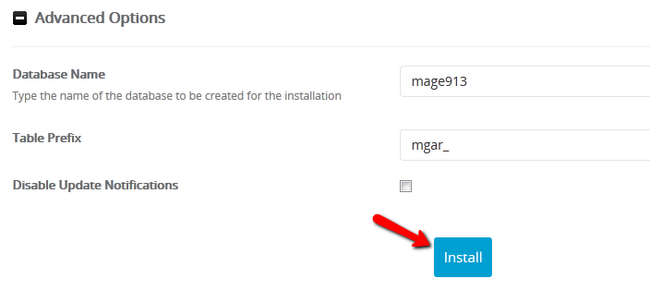
When you are ready to complete the installation, click on the Install button. Once done, you will receive confirmation and links to both your Store’s front-end and Admin area.
Congratulations, you have successfully installed Magento 2 using the Softaculous auto-installer.