I’ve heard many website owners complain about the security of WordPress. The main question is whether or not you’re able to completely secure your WordPress website. Are you going to find that it’s easy for someone to hack your site?
The thought is that an open source script is vulnerable to all sorts of attacks.
Luckily, this is mostly untrue. In fact, sometimes it’s the other way around. Okay, let’s say that it’s partially true. But even then the blame shouldn’t fall on WordPress.
Why? Because it’s usually the user’s fault that their site got hacked. There are some responsibilities that you have to take care of as a website owner. So the key question is, what are you doing to save your site from being hacked?**
Today, I plan to discuss quite a few simple tricks that can help you secure your WordPress website. After implementing these tactics and following up with continual security checks, you’ll be well on your way to secure your WordPress website for good.
Part (a): Secure your WordPress website by protecting the login page and preventing brute force attacks:
Everyone knows the standard WordPress login page URL. The backend of the website is accessed from there, and that is the reason why people try to brute force their way in. Just add /wp-login.php or /wp-admin/ at the end of your domain name and there you go.
What I recommend is to customize the login page URL and even the page’s interaction. That’s the first thing I do when I start securing my website.
Here are some suggestions for securing your WordPress website login page:
1. Set up a website lockdown feature and ban users
A lockdown feature for failed login attempts can solve the huge problem of continuous brute force attempts. Whenever there is a hacking attempt with repetitive wrong passwords, the site gets locked, and you get notified of this unauthorized activity.
I found out that the iThemes Security plugin is one of the best such plugins out there, and I’ve been using it for quite some time. The plugin has a lot to offer in this respect. Along with over 30 other awesome security measures, you can specify a certain number of failed login attempts before the plugin bans the attacker’s IP address.
2. Use 2-factor authentication
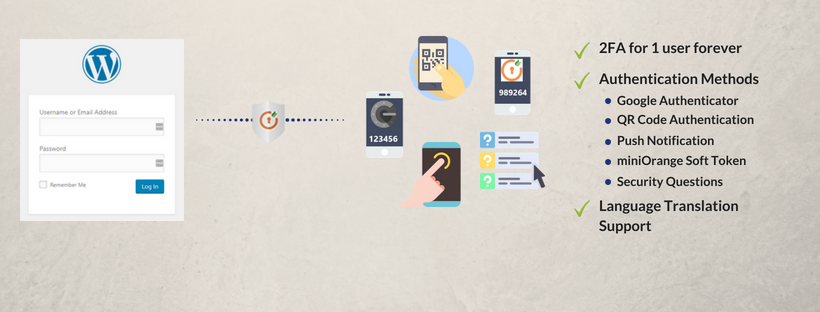
Introducing a 2-factor authentication (2FA) module on the login page is another good security measure. In this case, the user provides login details for two different components. The website owner decides what those two are. It can be a regular password followed by a secret question, a secret code, a set of characters, or more popular, the Google Authenticator app, which sends a secret code to your phone. This way, only the person with your phone (you) can log in to your site.
I prefer using a secret code while deploying 2FA on any of my websites. The Google Authenticator plugin helps me with that in just a few clicks.
3. Use your email to login
By default, you have to input your username to log into WordPress. Using an email ID instead of a username is a more secure approach. The reasons are quite obvious. Usernames are easy to predict, while email IDs are not. Also, any WordPress user account is created with a unique email address, making it a valid identifier for logging in.
By default, you have to input your username to log into WordPress. Using an email ID instead of a username is a more secure approach. The reasons are quite obvious. Usernames are easy to predict, while email IDs are not. Also, any WordPress user account is created with a unique email address, making it a valid identifier for logging in.
The WP Email Login plugin works out of the box for this purpose. It starts running right after the activation and requires no configuration at all.
To test it, just log out of your website and then log back in, but this time use the email address that you created the account with.
4. Rename your login URL to secure your WordPress website
Changing the login URL is an easy thing to do. By default, the WordPress login page can be accessed easily via wp-login.php or wp-admin added to the site’s main URL.
When hackers know the direct URL of your login page, they can try to brute force their way in. They attempt to log in with their GWDb (Guess Work Database, i.e. a database of guessed usernames and passwords; e.g. username: admin and password: p@ssword … with millions of such combinations).
At this point, we have already restricted the user login attempts and swapped usernames for email IDs. Now we can replace the login URL and get rid of 99% of direct brute force attacks.**
This little trick restricts an unauthorized entity from accessing the login page. Only someone with the exact URL can do it. Again, the iThemes Security plugin can help you change your login URLs. Like so:
Change wp-login.php to something unique; e.g. my_new_login
Change /wp-admin/ to something unique; e.g. my_new_admin
Change /wp-login.php?action=register to something unique; e.g. my_new_registeration
5. Adjust your passwords
Play around with your passwords and change them regularly to secure your WordPress website. Improve their strength by adding uppercase and lowercase letters, numbers, and special characters. Many people opt for long passphrases since these are nearly impossible for hackers to predict but easier to remember than a bunch of random numbers and letters.
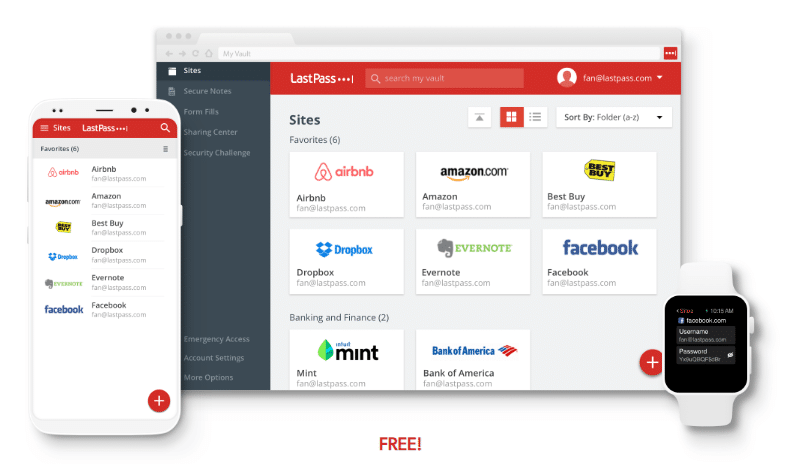
LastPass is one of the easiest ways to get on top of your passwords. It’ll not only generate safe passwords for you but then store them inside a browser add-on, which will save you the hassle of having to remember them.
Part (b): Secure your WordPress website through the admin dashboard
For a hacker, the most intriguing part of a website is the admin dashboard, which is indeed the most protected section of all. So, attacking the strongest part is the real challenge. If accomplished, it gives the hacker a moral victory and the access to do a lot of damage.
Here’s what you can do to secure your WordPress website admin dashboard:
6. Protect the wp-admin directory
The wp-admin directory is the heart of any WordPress website. Therefore, if this part of your site gets breached, then the entire site can get damaged.
One possible way to prevent this is to password-protect the wp-admin directory. With such a security measure, the website owner may access the dashboard by submitting two passwords. One protects the login page, and the other secures the WordPress admin area. If the website users are required to get access to some particular parts of the wp-admin, you may unblock those parts while locking the rest.
You can use the AskApache Password Protect plugin for securing the admin area. It automatically generates a .htpasswd file, encrypts the password and configures the correct security-enhanced file permissions.
7. Use SSL to encrypt data
Implementing an SSL (Secure Socket Layer) certificate is one smart move to secure the admin panel. SSL ensures secure data transfer between user browsers and the server, making it difficult for hackers to breach the connection or spoof your info.
Getting an SSL certificate for your WordPress website is simple. You can purchase one from a third-party company or check to see if your hosting company provides one for free.
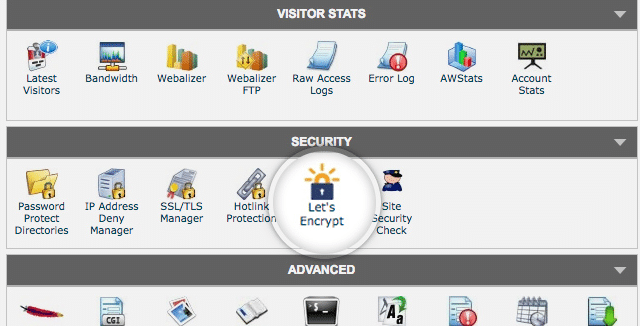
I use the Let’s Encrypt free open source SSL certificate on most of my sites. Any good hosting company like cloudtechtiq offers a free Let’s Encrypt SSL certificate with its hosting packages.
The SSL certificate also affects your website’s Google rankings. Google tends to ranks sites with SSL higher than those without it. That means more traffic. Now who doesn’t want that?
8. Add user accounts with care
If you run a WordPress blog, or rather a multi-author blog, then you need to deal with multiple people accessing your admin panel. This could make your website more vulnerable to security threats.**
You can use a plugin like Force Strong Passwords if you want to make sure that whatever passwords users make are secure. This is just a precautionary measure, but it’s better than having several users with weak passwords.

9. Change the admin username
During your WordPress installation, you should never choose “admin” as the username for your main administrator account. Such an easy-to-guess username is approachable for hackers. All they need to figure out is the password, then your entire site gets into the wrong hands.
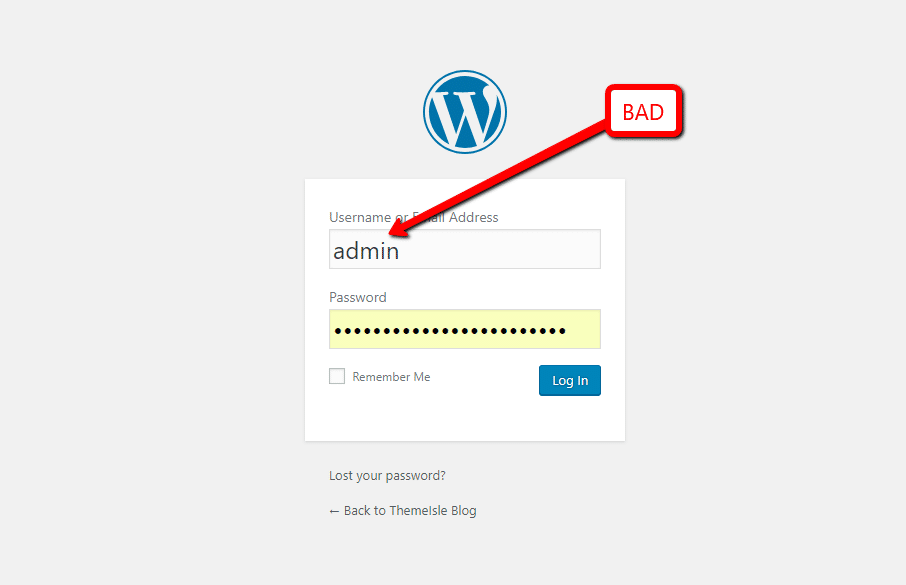
I can’t tell you how many times I have scrolled through my website logs, and found login attempts with username “admin”.
The iThemes Security plugin can stop such attempts by immediately banning any IP address that attempts to log in with that username.
10. Monitor your files
If you want some added security, monitor the changes to your website’s files via plugins like Wordfence, or again, iThemes Security.**
Part (c): Secure your WordPress website through the database
All of your site’s data and information is stored in the database. Taking care of it is crucial. Here are a few things you can do to make it more secure:
11. Change the WordPress database table prefix
If you have ever installed WordPress then you are familiar with the wp- table prefix that is used by the WordPress database. I recommend you change it to something unique.**
Using the default prefix makes your site database prone to SQL injection attacks. Such attacks can be prevented by changing wp- to some other term. For instance, you can make it mywp- or wpnew-
If you have already installed your WordPress website with the default prefix, then you can use a few plugins to change it. Plugins like WP-DBManager or iThemes Security can help you do the job with just a click of a button. (Make sure you back up your site before doing anything to the database).
12. Make backups regularly to secure your WordPress website
No matter how secure your WordPress website is, there is always room for improvements. But at the end of the day, keeping an off-site backup somewhere is perhaps the best antidote no matter what happens.
If you have a backup, you can restore your WordPress website to a working state any time you want. There are some plugins that can help you in this respect. For instance, there are all of these**.
If you are looking for a premium solution then I recommend VaultPress by Automattic, which is great. I have it set up so it creates backups every week. And should anything bad ever happen, I can easily restore the site with just one click.
I know some larger websites run backups every hour, but for most organizations that is complete overkill. Not to mention, you would need to ensure that most of those backups are being deleted after a new one is made, since each backup file takes up space on your drive. That said, I’d recommend weekly or monthly backups for most organizations.
On top of the backups, VaultPress also checks my site for malware, and alerts me if anything shady is going on.
13. Set strong passwords for your database
A strong password for the main database user is a must, since this password is the one WordPress uses to access the database.
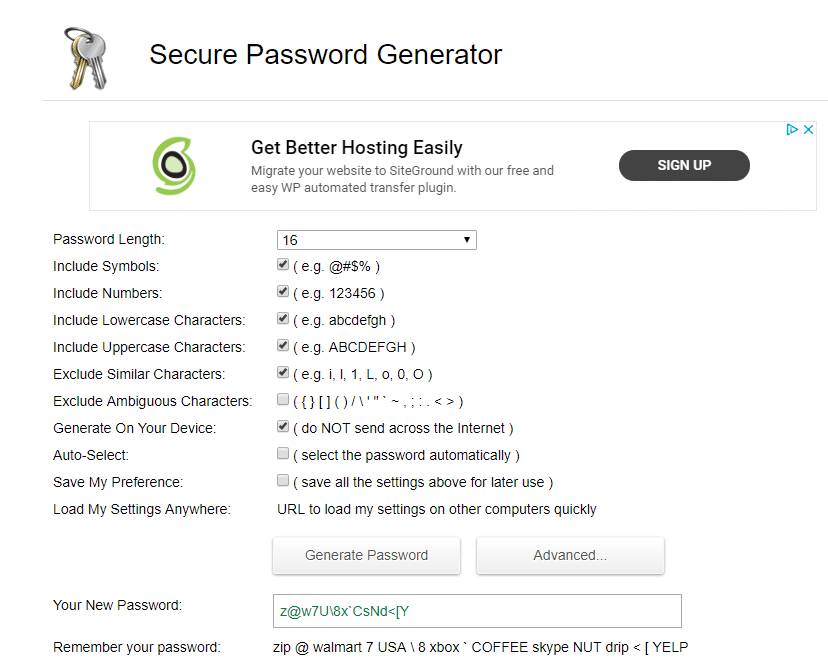
As always, use uppercase, lowercase, numbers, and special characters for the password. Passphrases are excellent as well. I once again recommend LastPass for random password generation and storing. A free, and quick, tool for making strong passwords is calledSecure Password Generator.**
14. Monitor your audit logs
When you’re running WordPress multisite, or handling a multi-author website, it’s essential to understand what type of user activity is going on. Your writers and contributors might be changing passwords, but there are other things you might not want to happen. For instance, theme and widget changes are obviously only reserved for the admins. When you check the audit log you’re able to make sure that your admins and contributors are not trying to change something on your site without approval.
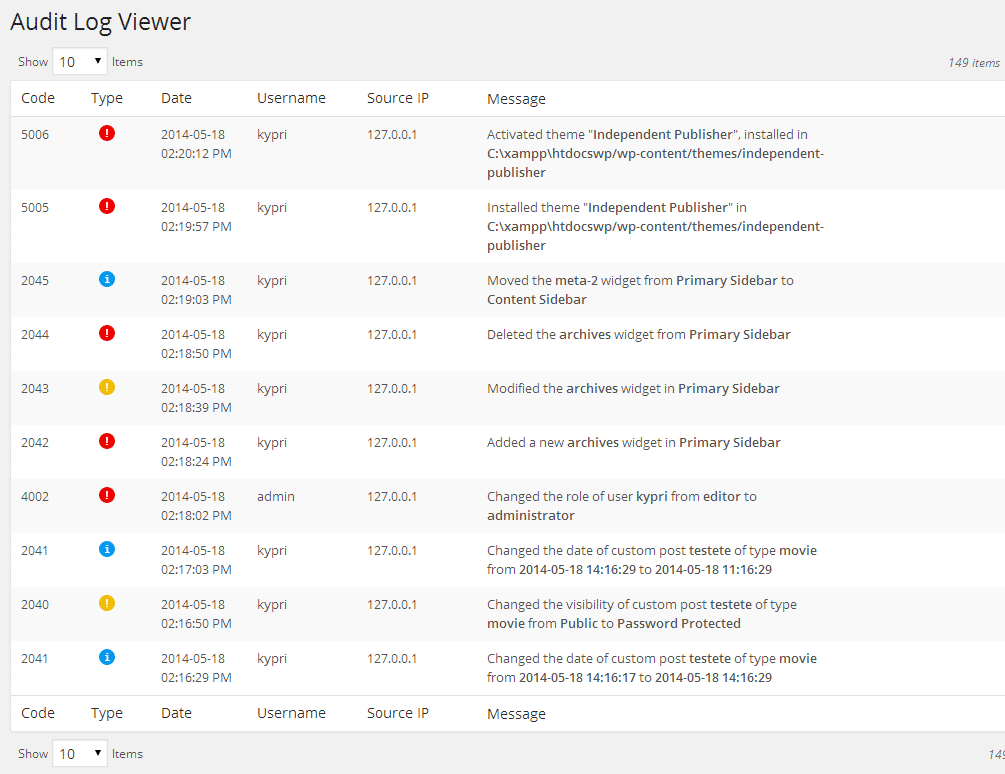
The WP Security Audit Log plugin provides a full list for this activity, along with email notifications and reports. At its simplest, the audit log could help you see that a writer is having trouble logging in. But the plugin might also reveal malicious activity from one of your users.
Part (d): Secure your WordPress website with hosting
Almost all hosting companies claim to provide an optimized environment for WordPress, but we can still go a step further:
15. Protect the wp-config.php file
The wp-config.php file holds crucial information about your WordPress installation, and it’s the most important file in your site’s root directory. Protecting it means securing the core of your WordPress blog.
This tactic makes things difficult for hackers to breach the security of your site, since the wp-config.php file becomes inaccessible to them.
As a bonus, the protection process is really easy. Just take your wp-config.php file and move it to a higher level than your root directory.
Now, the question is, if you store it elsewhere, how does the server access it? In the current WordPress architecture, the configuration file settings are set to the highest on the priority list. So, even if it is stored one folder above the root directory, WordPress can still see it.
16. Disallow file editing
If a user has admin access to your WordPress dashboard they can edit any files that are part of your WordPress installation. This includes all plugins and themes.
If you disallow file editing, no one will be able to modify any of the files – even if a hacker obtains admin access to your WordPress dashboard.
To make this work, add the following to the wp-config.php file (at the very end):
define('DISALLOW_FILE_EDIT', true);17. Connect the server properly
When setting up your site, only connect the server through SFTP or SSH. SFTP is always preferred over the traditional FTP because of its security features that are, of course, not attributed with FTP.
Connecting the server this way ensures secure transfers of all files. Many hosting providers offer this service as part of their package. If not – you can do it manually (just google for tutorials; there’s a lot of stuff out there).
18. Set directory permissions carefully
Wrong directory permissions can be fatal, especially if you’re working in a shared hosting environment.
In such a case, changing files and directory permissions is a good move to secure the website at the hosting level. Setting the directory permissions to “755” and files to “644” protects the whole filesystem – directories, subdirectories, and individual files.
This can be done either manually via the File Manager inside your hosting control panel, or through the terminal (connected with SSH) – use the “chmod” command.
For more, you can read about the correct permission scheme for WordPress or install the iThemes Security plugin to check your current permission settings.
19. Disable directory listing with .htaccess
If you create a new directory as part of your website and do not put an index.html file in it, you may be surprised to find that your visitors can get a full directory listing of everything that’s in that directory.
For example, if you create a directory called “data”, you can see everything in that directory simply by typing in your browser. No password or anything is needed.
You can prevent this by adding the following line of code in your .htaccess file:
Options All -Indexes20. Block all hotlinking
Let’s say you locate an image online and would like to share it on your website. First of all, you need permission or to pay for that image, otherwise there’s a good chance it’s illegal to do so. But if you do get permission, you might directly pull the image’s URL and use that to place the photo in your post. The main problem here is that the image is shown on your site, but being hosted on another site’s server.
From this perspective, you don’t have any control over whether or not the photo remains on the server. But it’s also important to realize that people might do this to your website.
If you’re trying to secure your WordPress website, hotlinking is basically another person taking your photo and stealing your server bandwidth to show the image on their own website. In the end, you’ll see slower loading speeds and the potential for high server costs.
Although there are some manual techniques for preventing hotlinking, the easiest method is to find a security plugin for the job. For instance, the All in One WP Security and Firewall plugin includes built-in tools for blocking all hotlinking.
21. Understand, and protect, against DDoS attacks
A DDoS attack is a common type of strike against your server bandwidth, where the attacker uses multiple programs and systems to overload your server. Although an attack like this does not jeopardize your site files, it’s meant to crash your site for a long period of time if not resolved. Usually, you only hear about DDoS attacks when it happens to large companies like GitHub or Target. They’re conducted by what many refer to as cyber-terrorists, so the motive might simply be to wreak havoc.
That said, you don’t need to be a Fortune 500 company to be at risk.
If this worries you, we recommend signing up for the Sucuri or Cloudflare premium plans. These solutions have web application firewalls to analyze the bandwidth being used and block out DDoS attacks entirely.
Part (e): Secure your WordPress website through themes and plugins
Themes and plugins are essential ingredients for any WordPress website. Unfortunately, they can also pose serious security threats. Let’s find out how we can secure your WordPress themes and plugins the right way
22. Update regularly
Every good software product is supported by its developers and gets updated now and then. These updates are meant to fix bugs and sometimes have vital security patches. WordPress, and its plugins, is no different.
Not updating your themes and plugins can mean trouble. Many hackers rely on the mere fact that people can’t be bothered to update their plugins and themes. More often than not, those hackers exploit bugs that have already been fixed.
So, if you’re using any WordPress product, update it regularly. Plugins, themes, everything. The good news is that WordPress automatically rolls out updates for its users, so you’ll receive an email notifying you of the update and information on the fixes in your dashboard.
As for the plugins, these must be updated manually by going to Plugins in your dashboard. When a plugin has a new version, it notifies you and provides a link to update now.
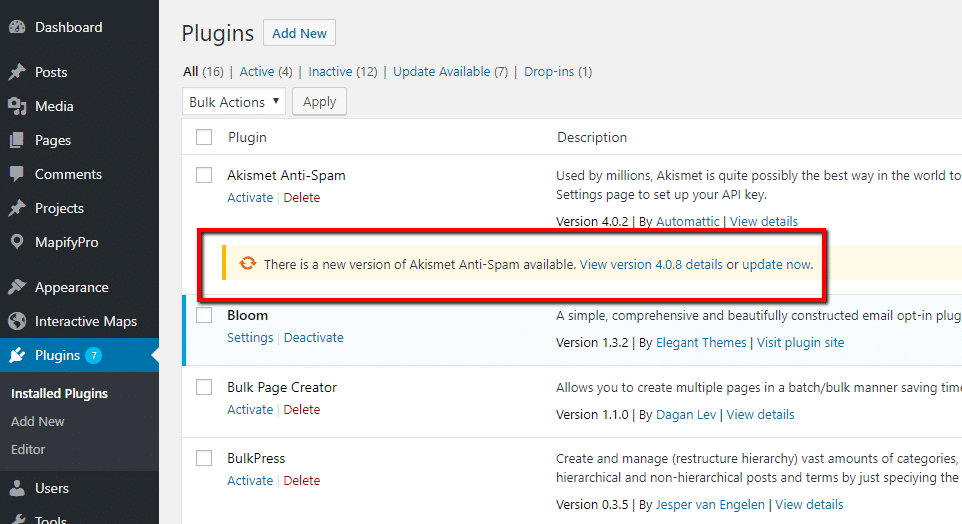
As an alternative, you could opt for a managed WordPress hosting plan. Along with many other features and improvements to your security, quality managed hosting offers automatic updates for all elements of your WordPress site.
23. Remove your WordPress version number
Your current WordPress version number can be found very easily. It’s basically sitting right there in your site’s source view. You can also see it on the bottom of your dashboard (but this doesn’t matter when trying to secure your WordPress website).
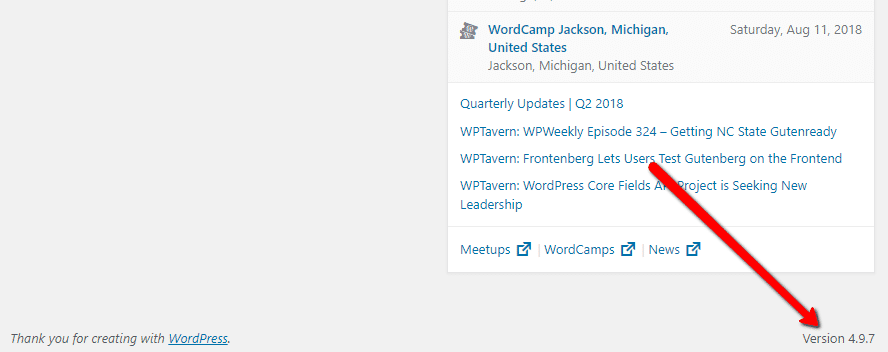
Here’s the thing: if hackers know which version of WordPress you use, it’s easier for them to tailor-build the perfect attack.
You can hide your version number with almost every security plugin that I mentioned above.
For a more manual approach (and to also remove the version number from RSS feeds,) consider adding the following function to your functions.php file:
function wpbeginner_remove_version() {
return '';
}
add_filter('the_generator', 'wpbeginner_remove_version');
Final thoughts on how to secure your WordPress website If you are a beginner then that was a lot to take in. However, everything that I mentioned in this article is a step in the right direction. The more you care about your WordPress site security, the harder it gets for a hacker to break in.


